 |
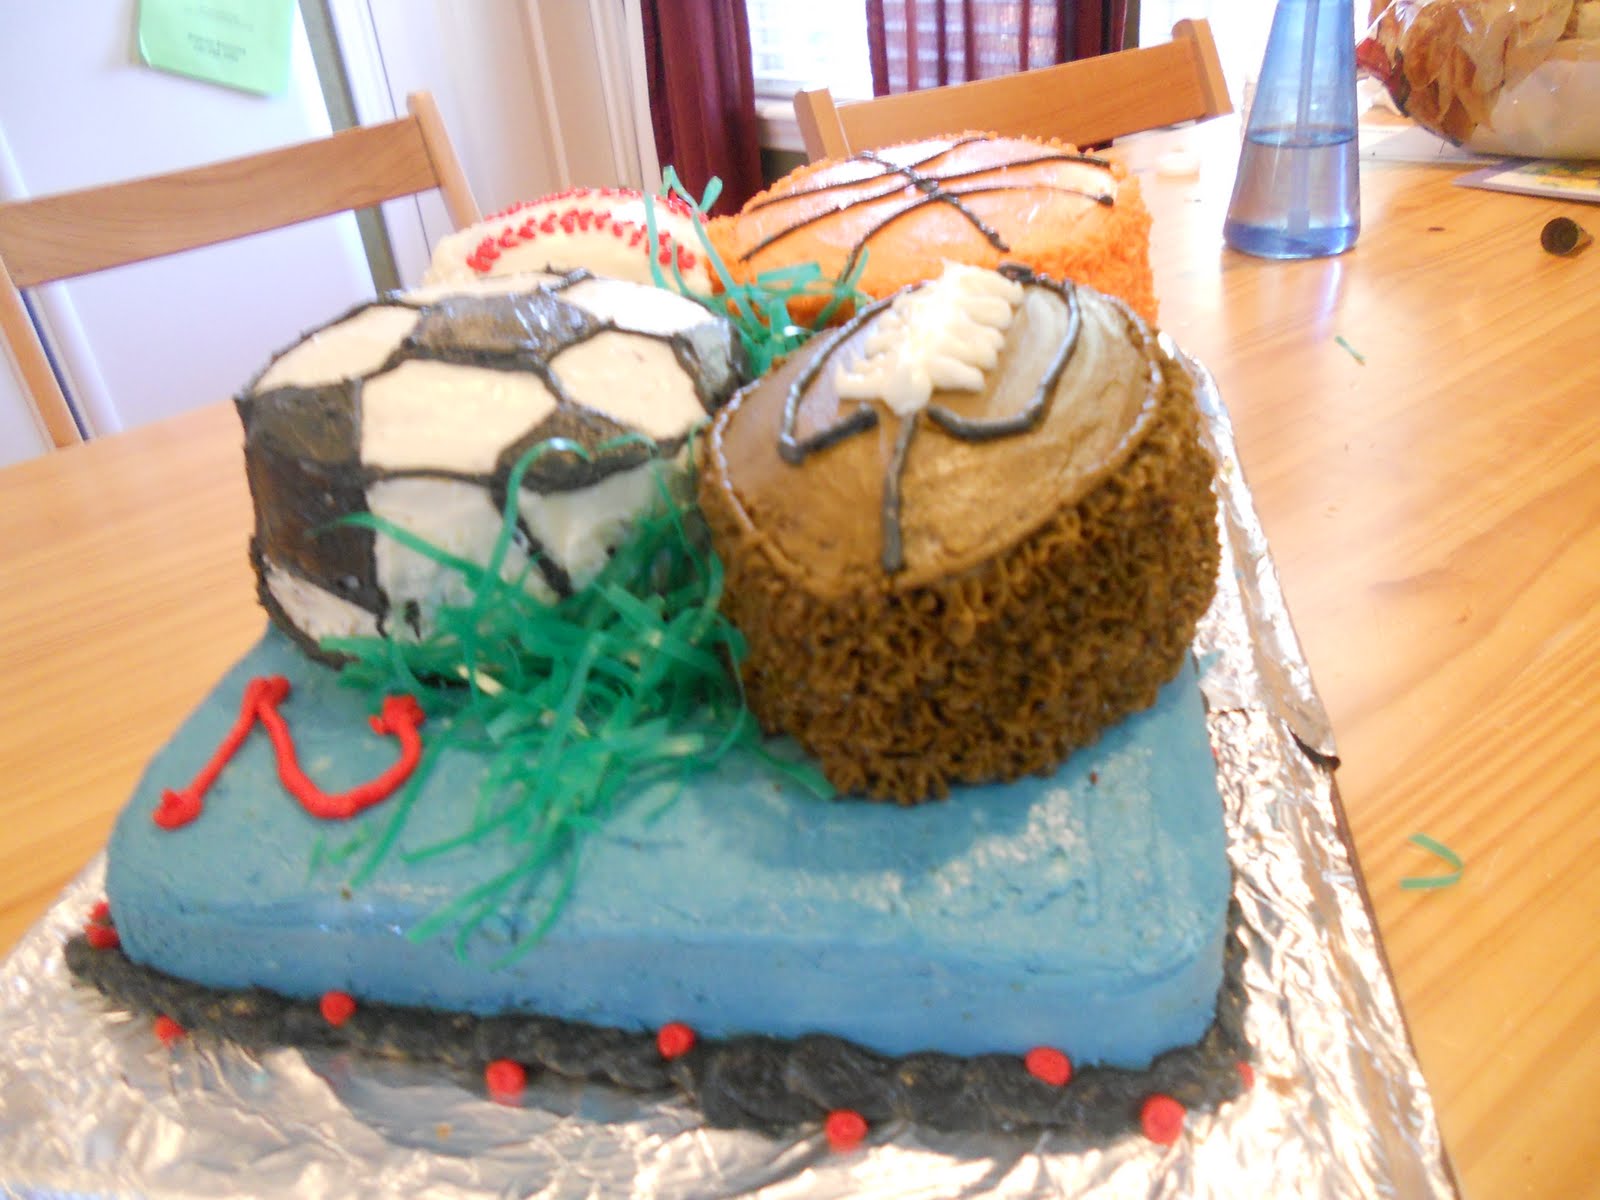
| The finished product |
Step 1-Bake a cake
Bake a 9x13 size cake. You can use a cake mix or your favorite made-from-scratch cake recipe.
Step 2- Freeze Cake
After the cake has cooled, remove it from the pan and let it cool completely. If you aren't making the cake the day of, then wrap it well with saran wrap and then foil and place on a flat rack in the freezer (this helps make it easier to decorate and keeps it fresh if you bake it a couple days in advance).
Step 3-Make Ball Shapes
This is where the fun begins. Choose which balls you are planning on making. I did a baseball, basketball, football and soccer ball. Find household items that are the size/shape you want to use as your 'mold'. If you have cookware that is the right size and oven-safe, then you're in luck! :) If not, you can do what I did, I made my molds out of foil. First I found things that I could use for the shapes I needed and made sure they'd fit on the 9x13 base cake.
 |
| Trying out the sizes |
After I shaped the foil cups, I put them in a pan to bake them in.
 |
| My foil cups |
Step 4- Bake the Ball Cakes
Pour your pre-mixed cake batter (again whatever kind you like-although my tip is to avoid chocolate, especially if you are a beginner decorator, I made that mistake!) into the shaped cups you have made. I filled them about 1/2 way, but if you'd like them to be a little less '3D' then fill them 1/4 full.


Step 5- Frost the base cake
Choose a color that you'd like for the base cake and put a solid layer across the whole thing.
Side note about frosting: it's best to mix your colors hours before you plan to use them because they get bolder in time. If you mix them as early as the night before it'll give you a better idea of what they'll look like and you'll have a chance to change them if necessary & give them time to darken before you're ready to use them.
Step 6- Frost the ball cakes
Frost a solid layer of the appropriate frosting on the ball shape. Along the sides you can use a design tip on the sides to add some texture and easier frosting, if you like. I looked up pictures of each ball online to make sure I had the design on them done correctly.

For the soccer ball I drew the shapes on with a toothpick so I'd know where to apply the black frosting.
 |
| This about drove me mad! It was tricky! |
-A frosting spatula, either straight or angled.


Today I linked up to these parties:


-For all the lines and edging around each ball I used the Round Tip #2.
-For the sides of the balls I used Star Tip #16.
Step 7- Place the balls on the base cake
I placed the balls on the cake before I finished all the detail on them because I knew they'd get messed up in the transfer (notice my baseball).
 |
| Balls were just placed on the base, needing some touch ups and finishing! |
Step 8- Finishing Touches and Fixes
Add the finishing touches to the balls by adding the rest of the design or fixing blemishes that were caused by moving them.
 |
| Oh dear, that hole looks awful! |
Notice the ugly hole in between the balls? Yep, had to fix that. My solution? Easter grass in the center and along the sides of the ball to add texture & flair (but mostly because I had a problem to solve!) I must give credit to my husband, because he's the one that came up with the idea--genius, right? :) Problem solved.
 |
| Thanks honey! |
I added a number 2 in the corner to bring in some more color and for my memory's sake! ;)
I added a quick border along the edge of the cake to give it a finished look.
For the border I used Tip #104

Step 9- Take lots of pictures


Step 10- Sing Happy Birthday, Blow out candles and Enjoy!

I hope you're able to use these directions to make your own special ball birthday cake! If you do and chose to blog about it, please link people back to these directions to give me credit for my hard work to create this cake pattern! Thank you!
Today I linked up to these parties:

Great cake! And so glad you posted it! I have been just starting "research" for Elijah's first birthday and Josh picked a sport's theme!! What type of tools did you use for the frosting?
ReplyDeleteA Sports theme is fun! :) Good question, I'll look at all my tools and update the post with all the details for that.
ReplyDeleteso fun! my creative daughter...you did a fantastic job on that super memorable birthday! xoxo
ReplyDeleteVery clever and cute :) Thanks for your sweet comment on my kitchen too! Have a great weekend, Laurel
ReplyDeleteWhat a great idea for a cake! Looks fantastic!
ReplyDeleteThanks for linking to a Round Tuit!
Hope you have a great weekend!
Jill @ Creating my way to Success
http://www.jembellish.blogspot.com/
Nice work! So great!
ReplyDelete